Migrating from GitHub to Gitopia
Gitopia Mirror Action
Gitopia Mirror Action is a GitHub action for mirroring your GitHub repoistories automatically to another remote repository on Gitopia. Branches, tags, and commits can be mirrored.
Gitopia Mirror Action is available in the GitHub Marketplace.
Pre-requisites
To use the Gitopia Mirror Action:
- You need to have a repository on GitHub
- You must have at least the Maintainer role for the project
- You need to have a Gitopia wallet file
To improve privacy, we recommend that you keep a separate wallet, added as a collaborator, for providing keys for GitHub Secret and mirroring your code from GitHub to Gitopia. This way, you can avoid exposing your main wallet to GitHub and keep it secure.
Step 1: Create a new repository on Gitopia
To get started, create a new repository on Gitopia. For help Click Here. Once successful, you would be redirected to the new repository page.
Step 2: Copy Remote URL
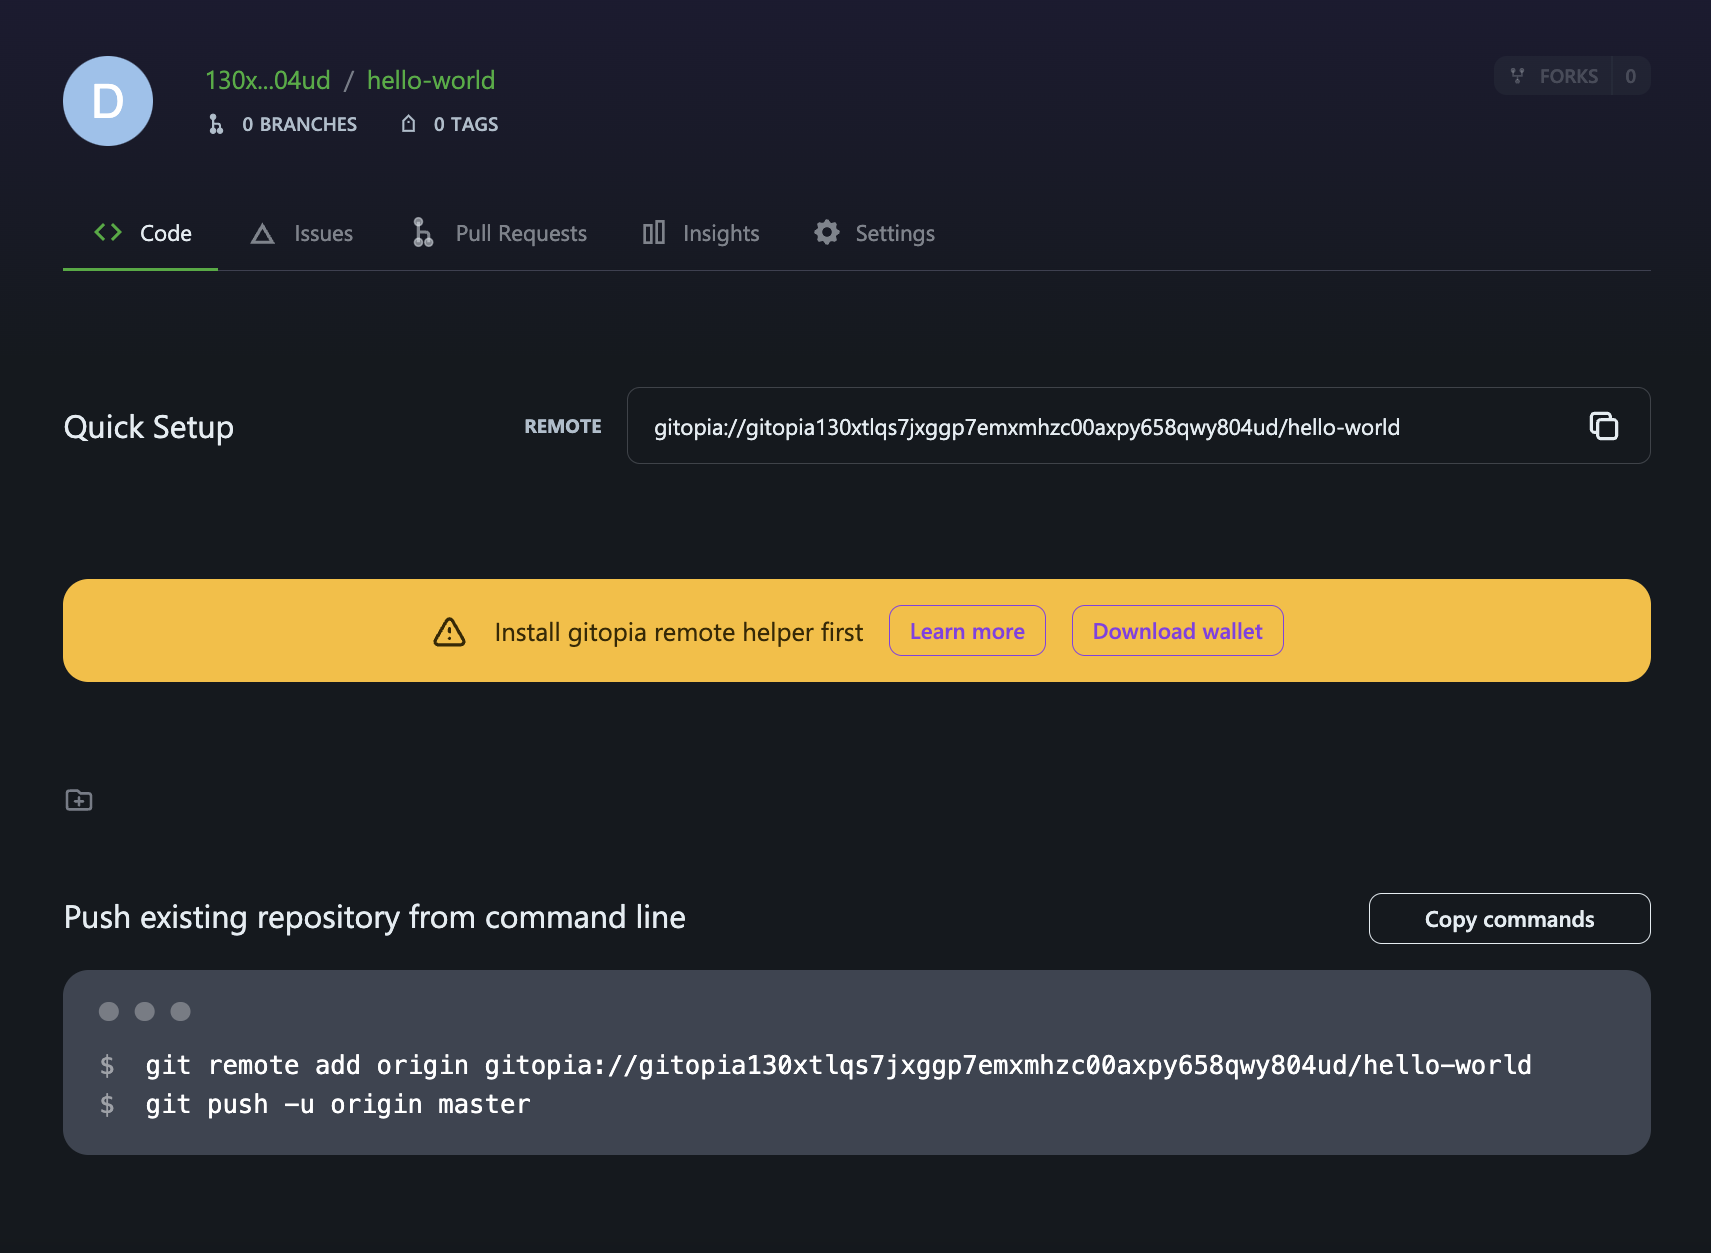
Copy the remote URL from the repository page, as suggested in the image below.

Sample Url - gitopia://Gitopia-User/hello-world
Step 3: Download Wallet File
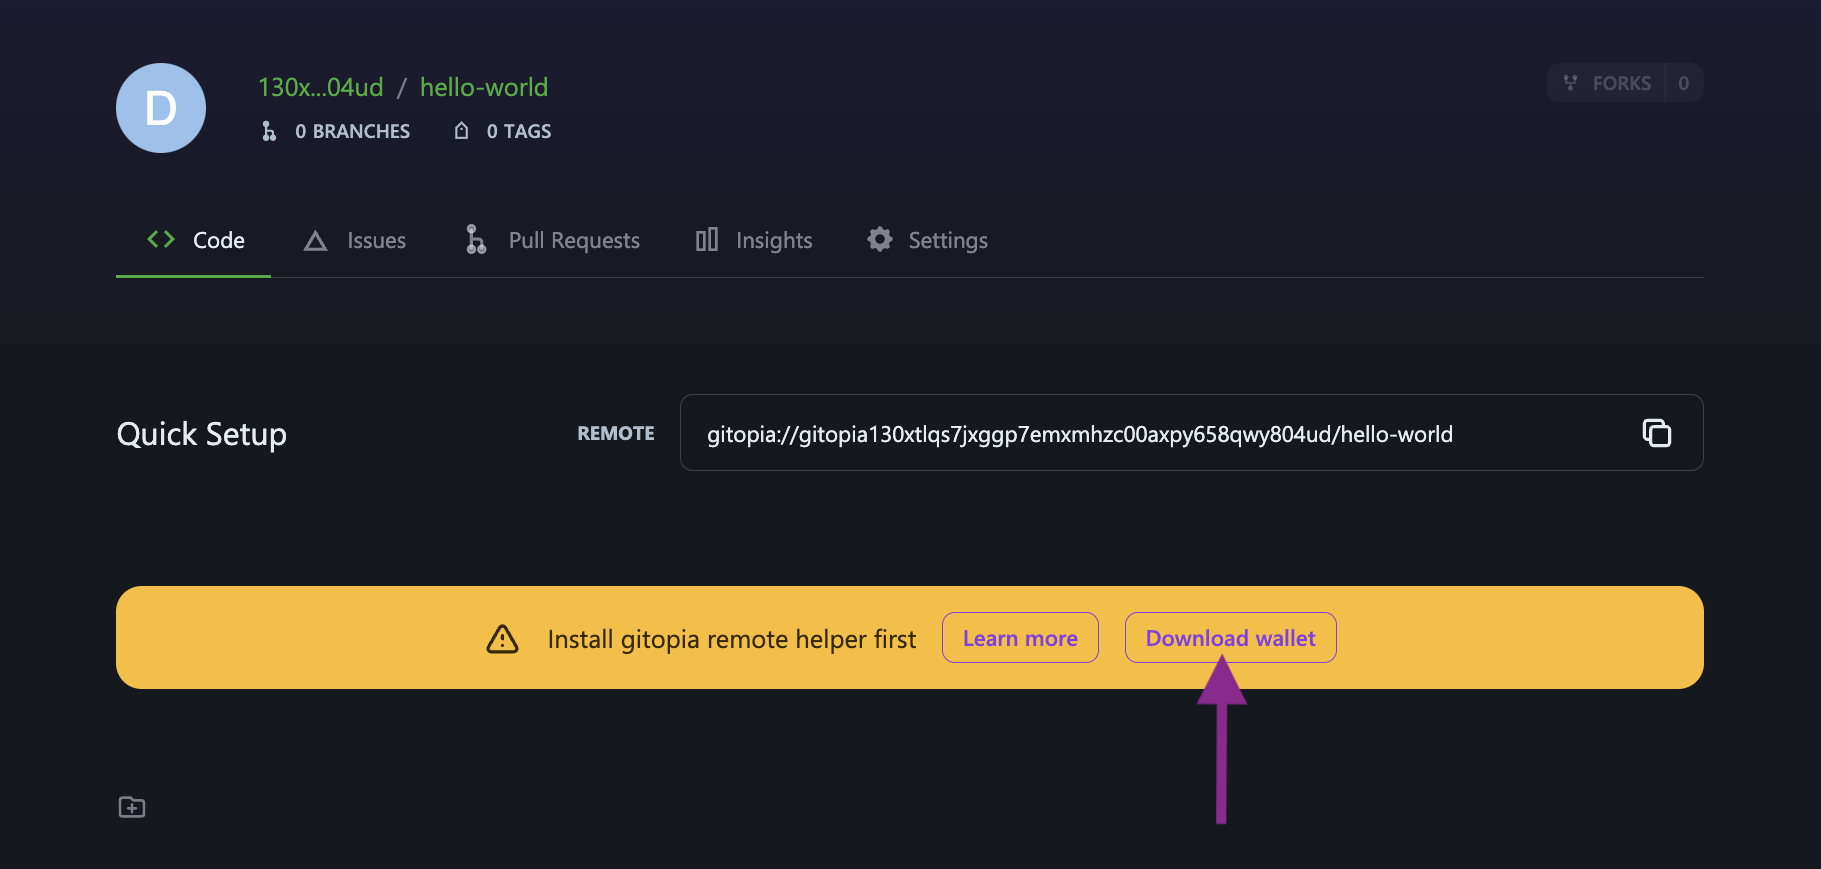
Download the wallet file by clicking on Download wallet as shown in the image. Use this guide for help in downloading your wallet file.
Step 4: Navigate to GitHub Repository
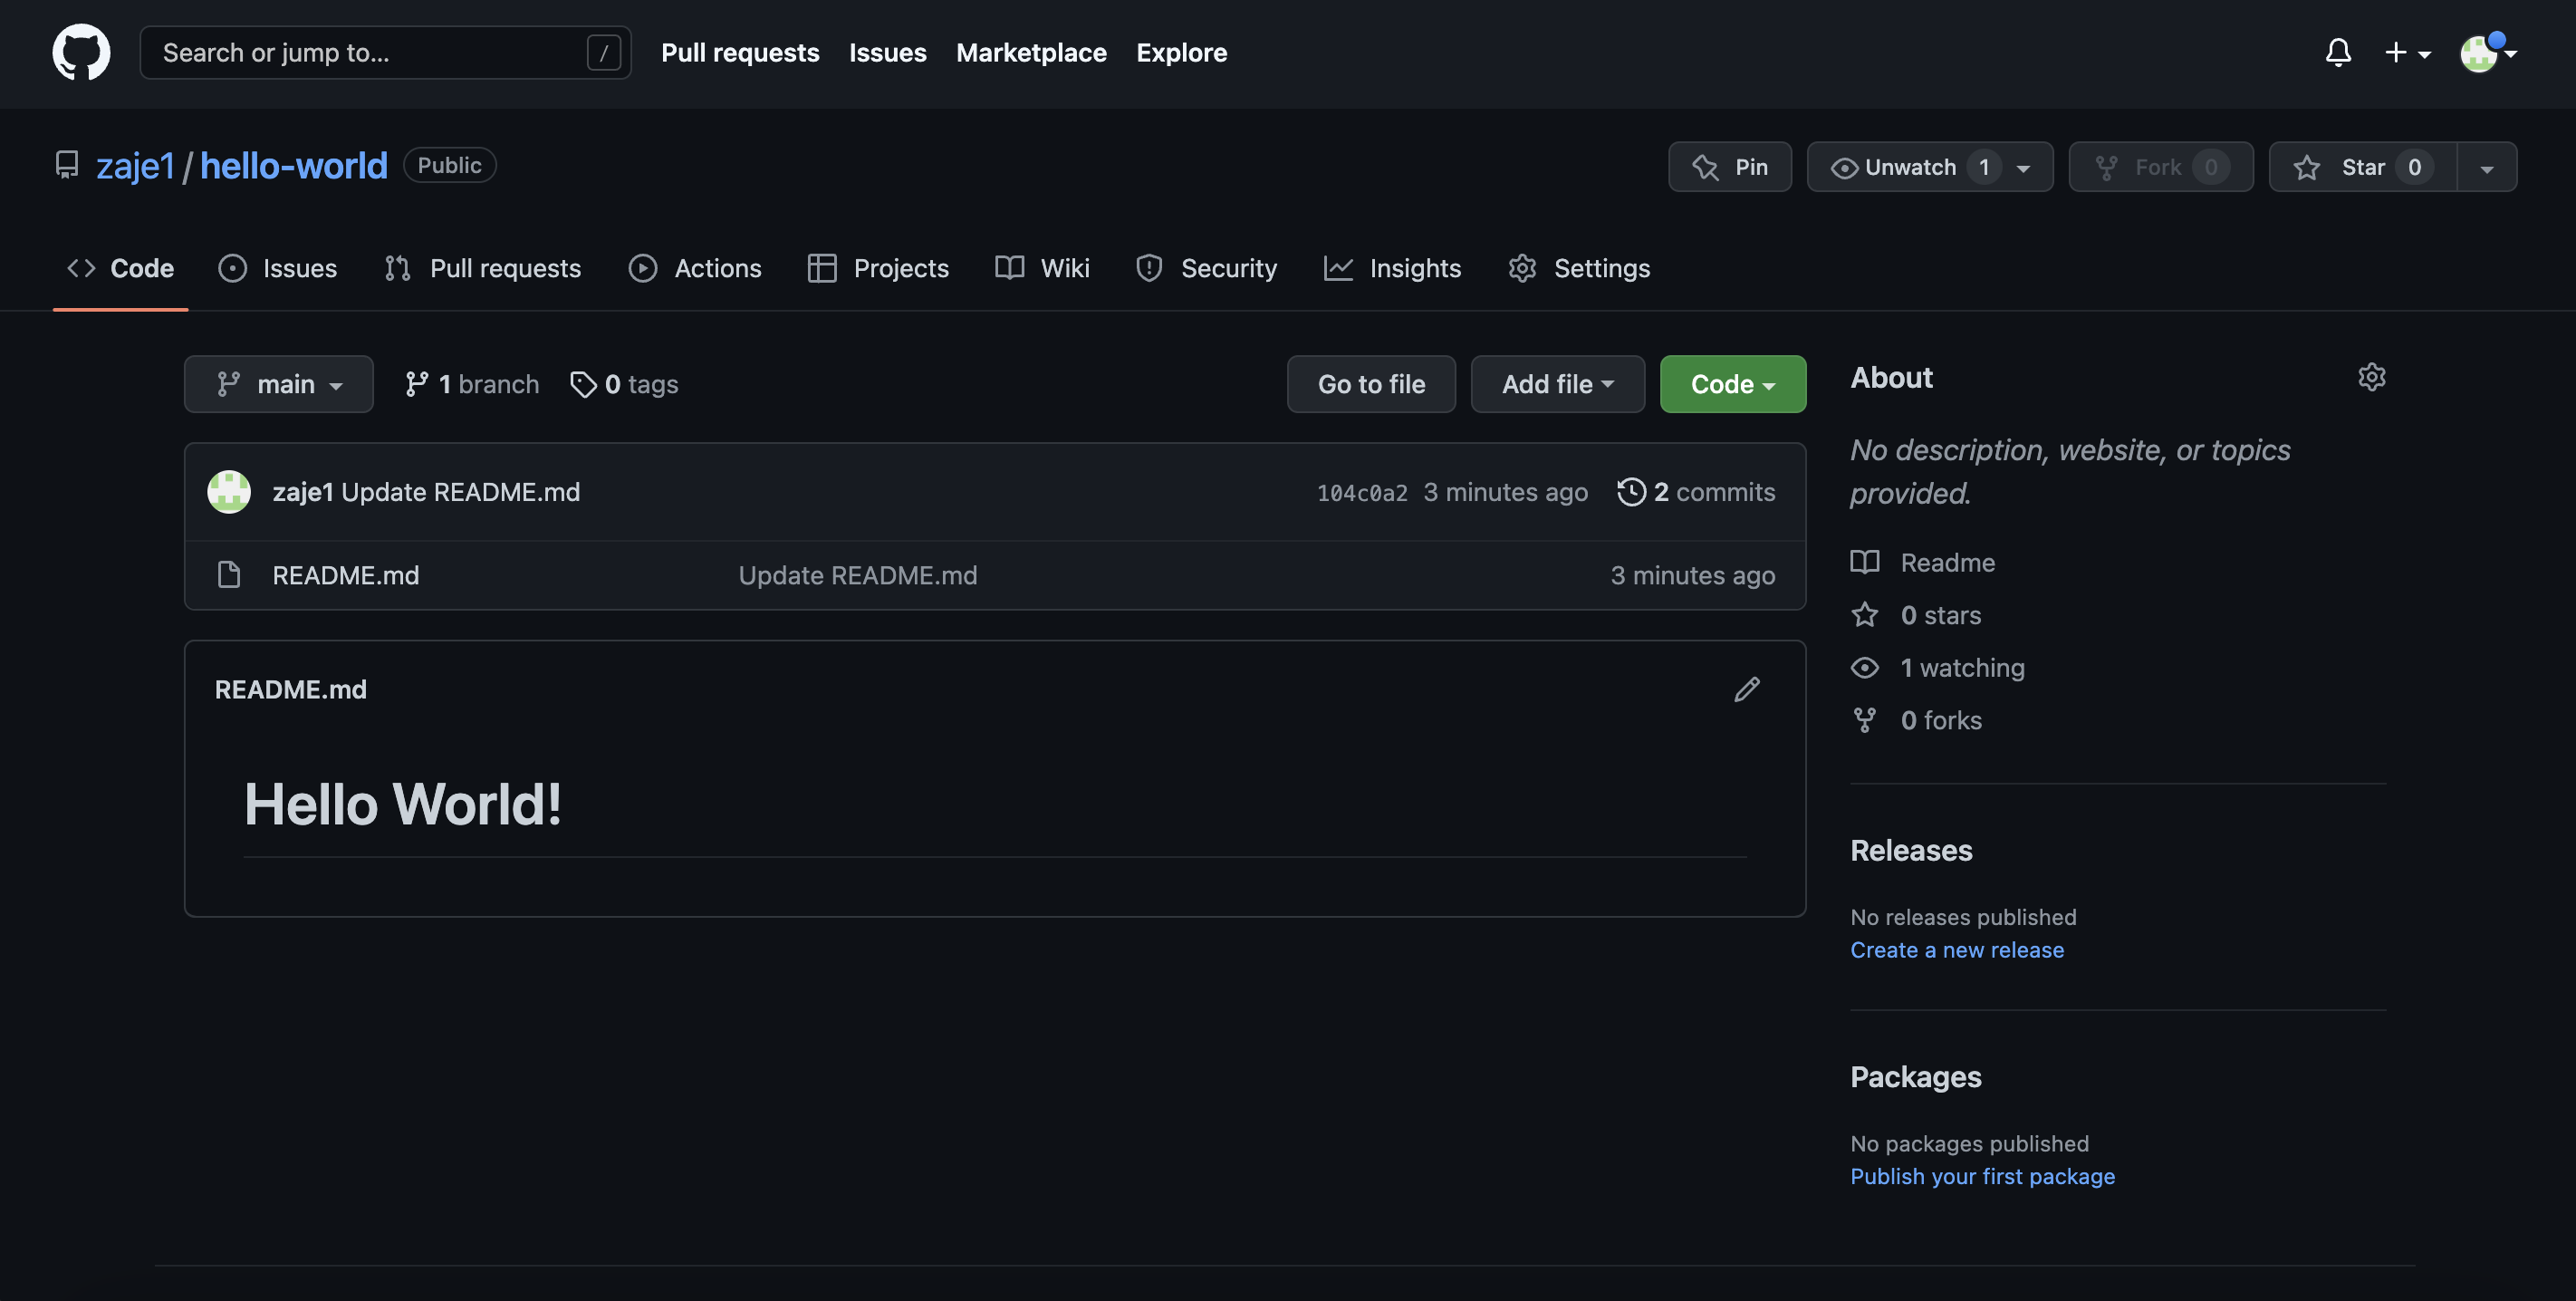
Navigate to the GitHub repository you want to migrate to Gitopia on your browser.
Step 5: Go to GitHub Secrets
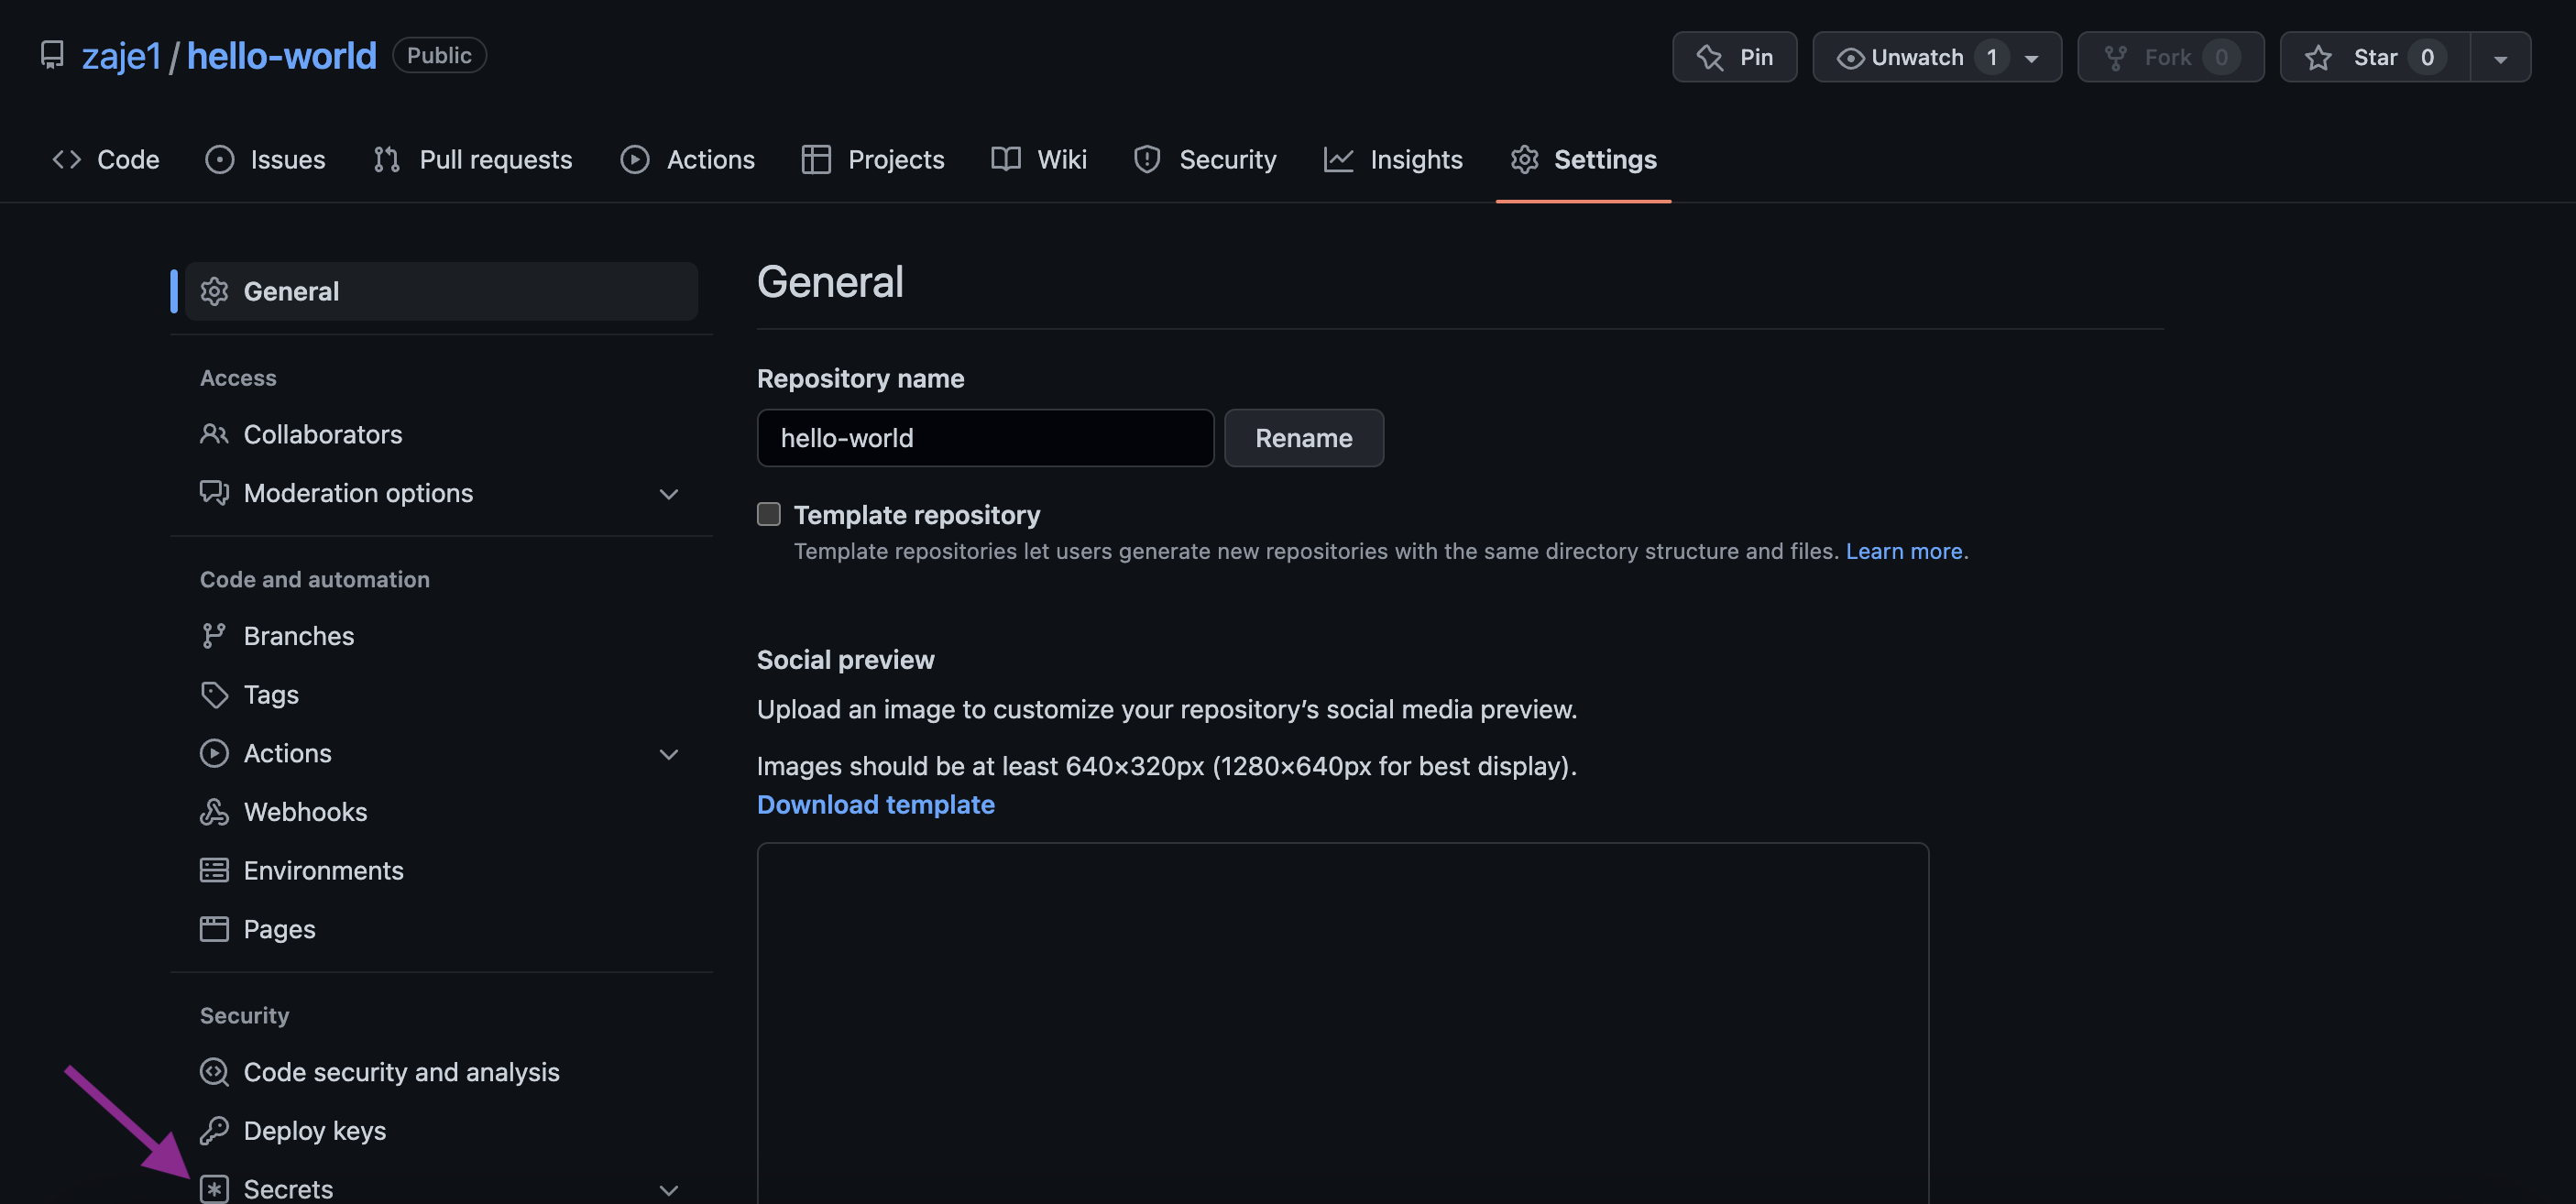
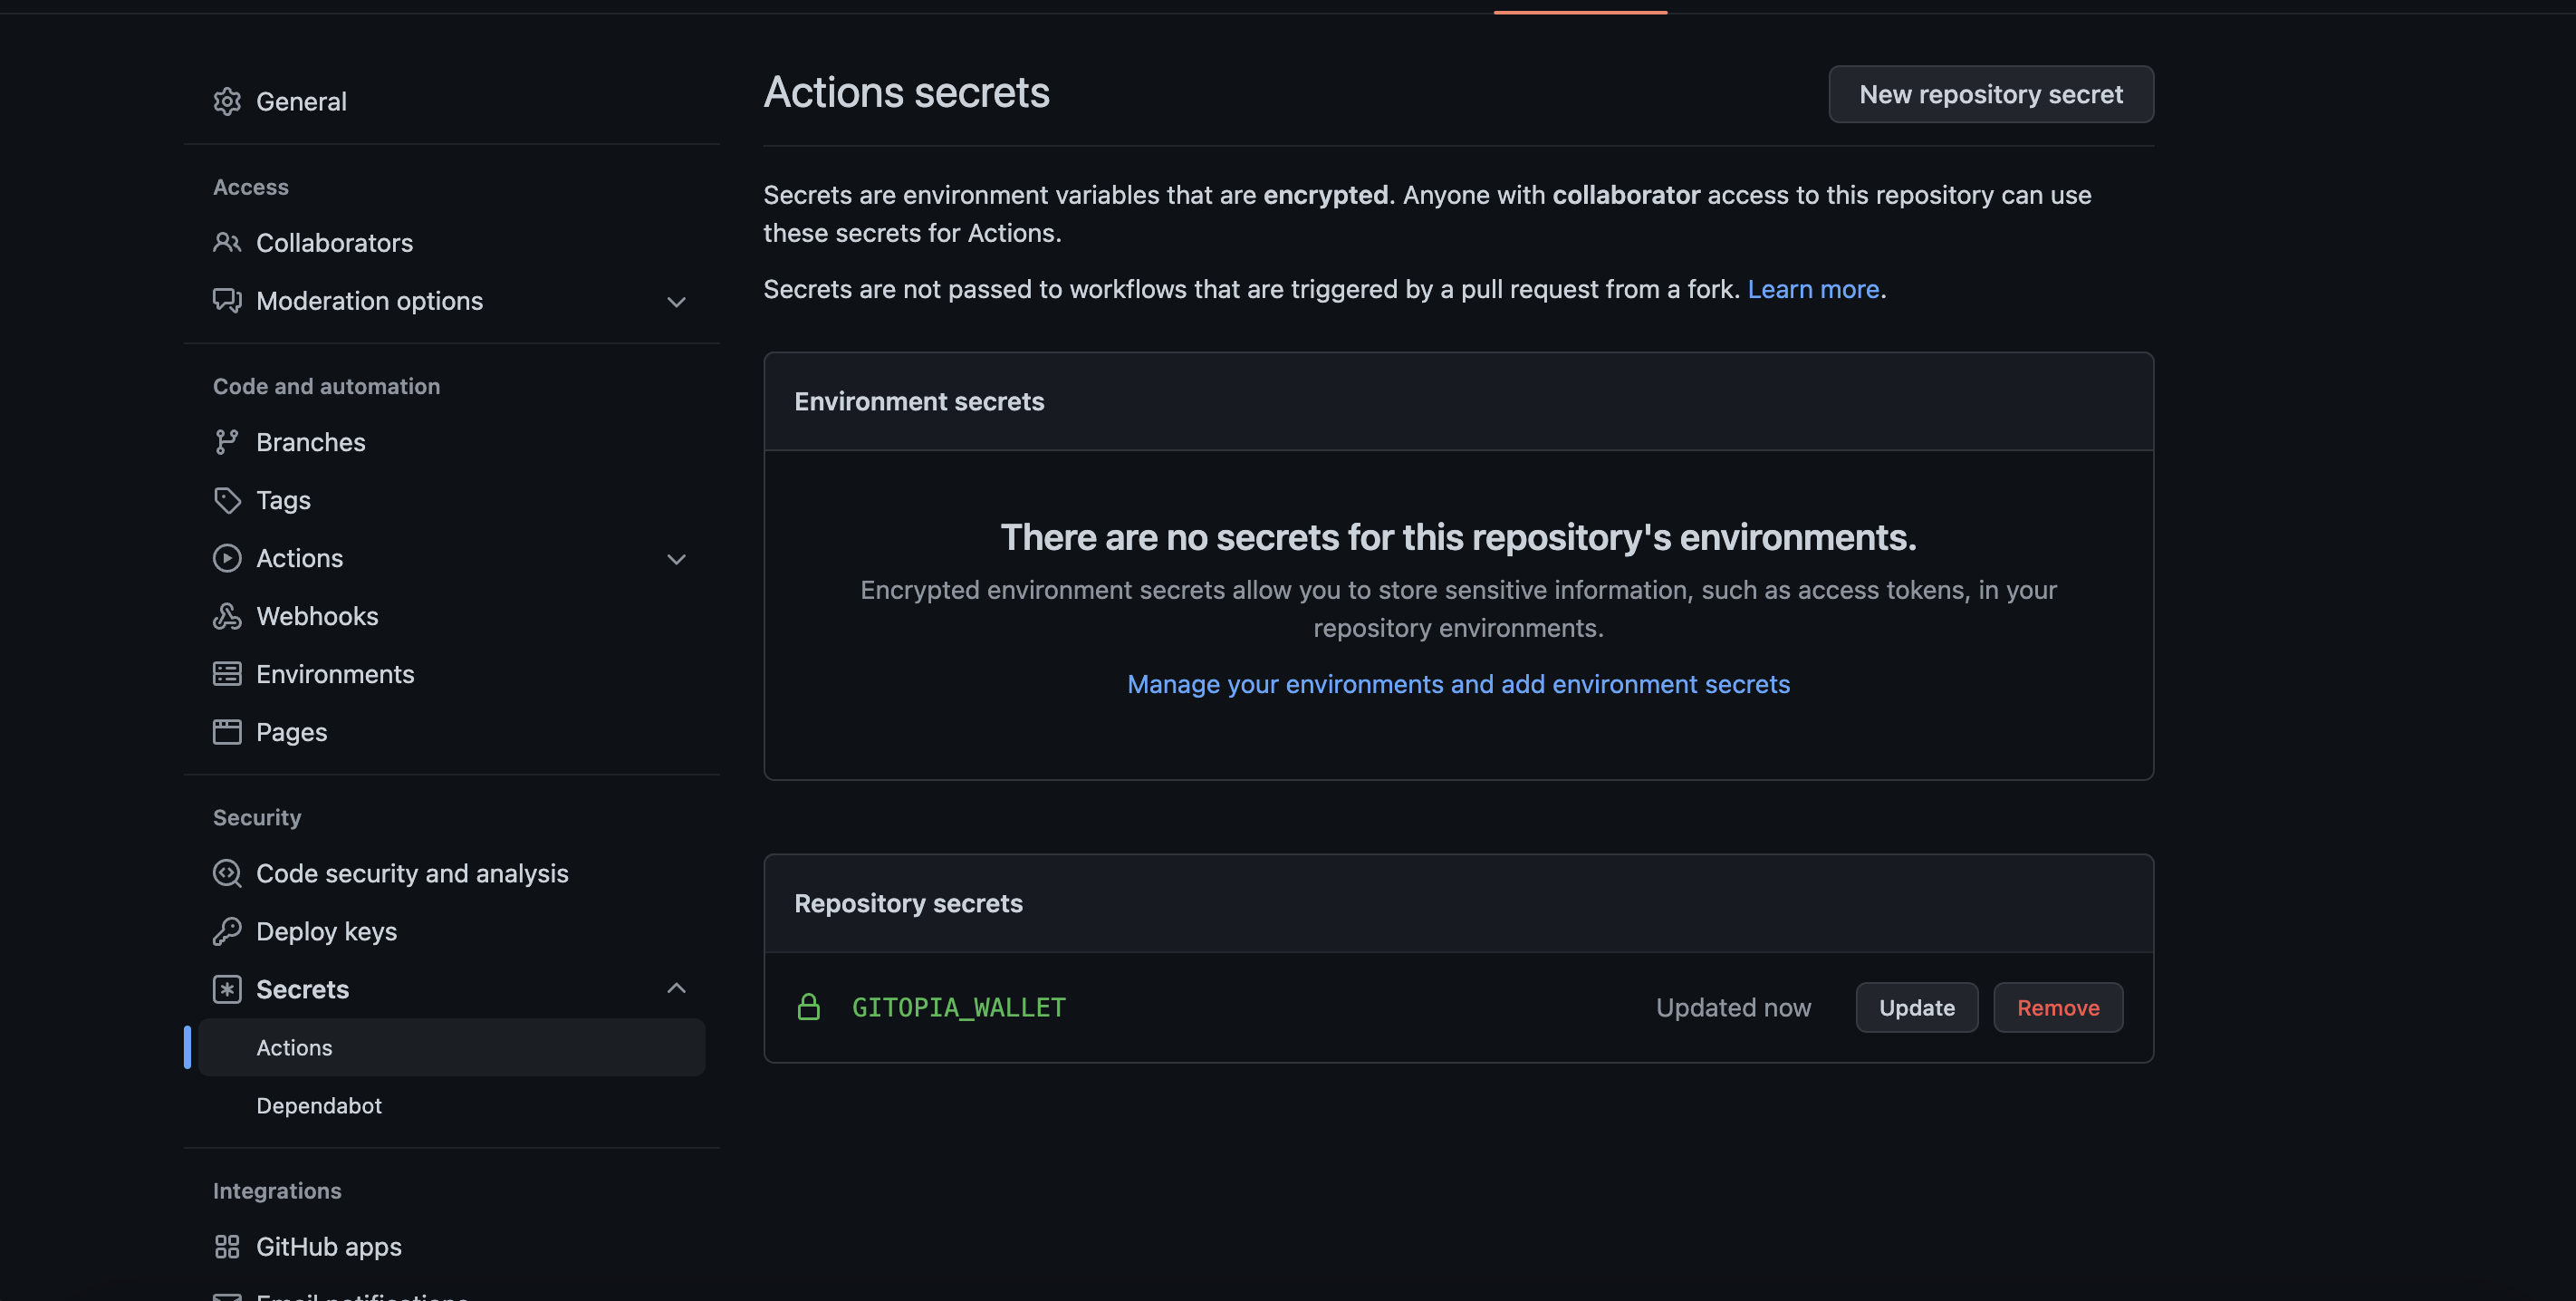
- You need to add Gitopia wallet contents to GitHub secrets called GITOPIA_WALLET. To do this, navigate to the repository Settings and then click on Secrets as shown in the image.
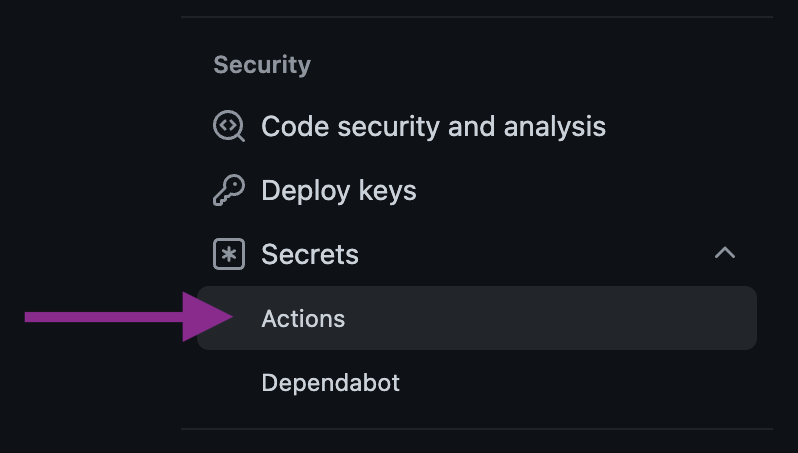
- Click on Actions under Secrets. This will help you create Secrets for your repository. Secrets are environment variables that are encrypted.
Step 6: Create a New Action Secret
- Click on New repository secret.
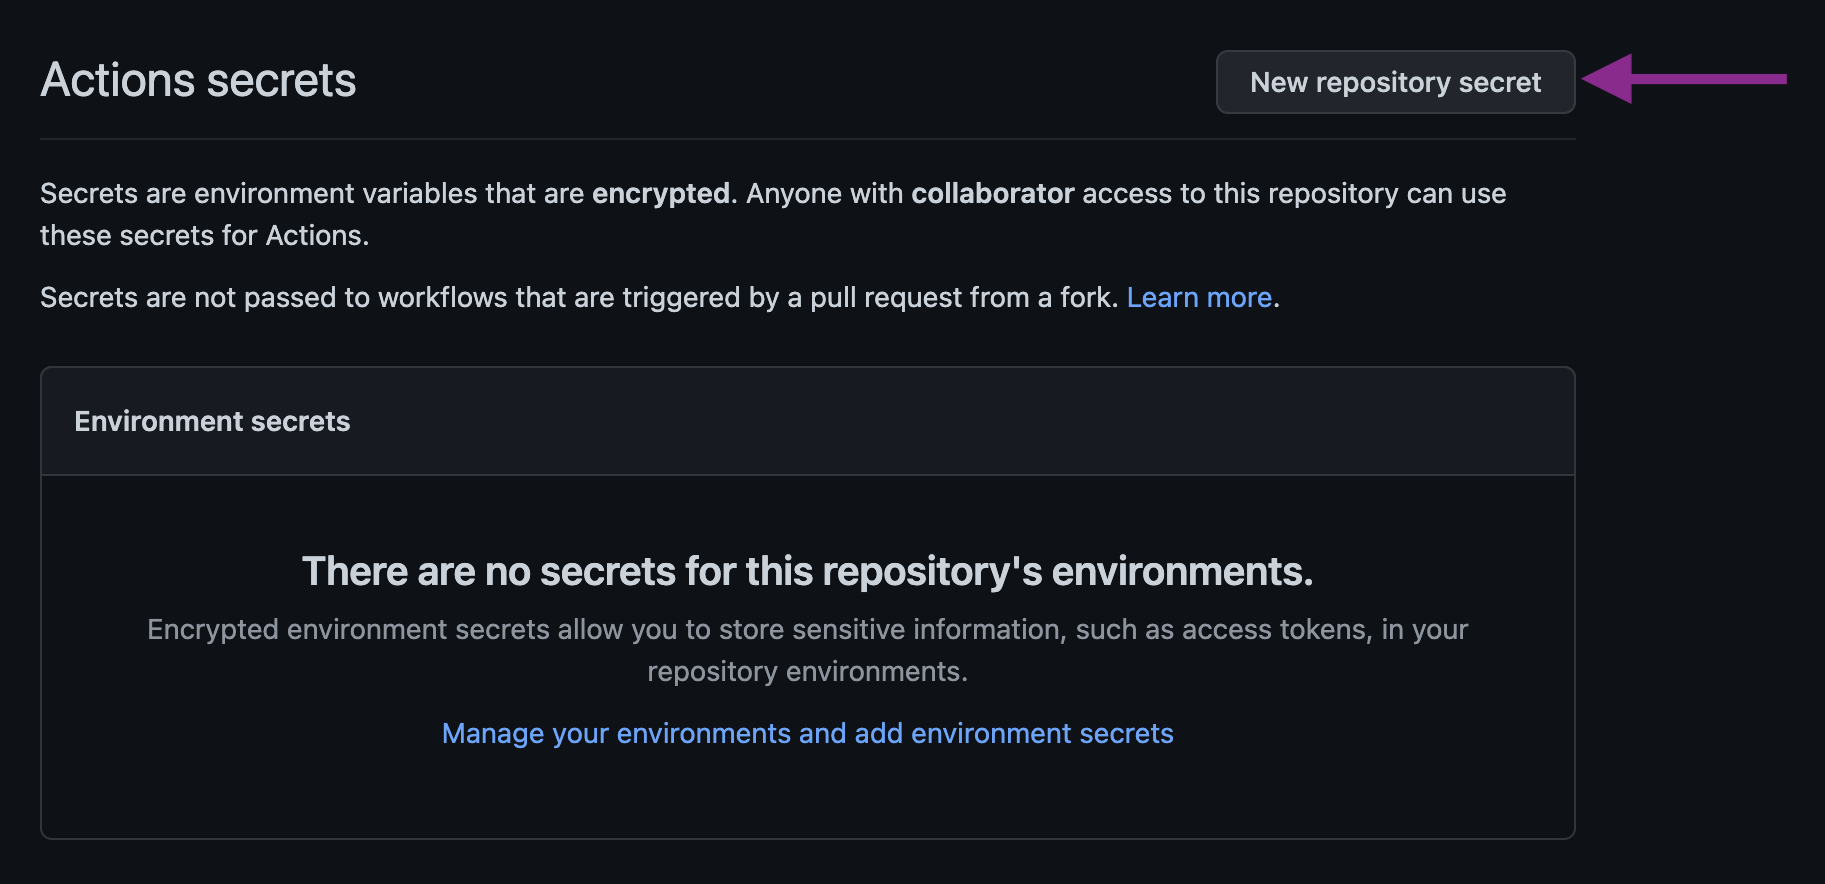
It will take you to the Action Secret creation page.

- Fill in the details as shown below.
Name: GITOPIA_WALLET
Value: Paste the contents for your Gitopia Wallet file here
A typical wallet file content is shown below:
{
  "name": "Gitopia-User",
  "mnemonic": "magic practice outdoor car vacant unveil lamp absurd cliff region grape burst always creek cat ill hand magic scorpion acquire seminar jump pen hand",
  "HDpath": "m/44'/118'/0'/0/",
  "password": "aaaaaaaa",
  "prefix": "gitopia",
  "pathIncrement": 0,
  "accounts": [
    {
      "address": "gitopia130xtlqs7jxggp7emxmhzc00axpy658qwy804ud",
      "pathIncrement": 0
    }
  ]
}
- Click on Add Secret.
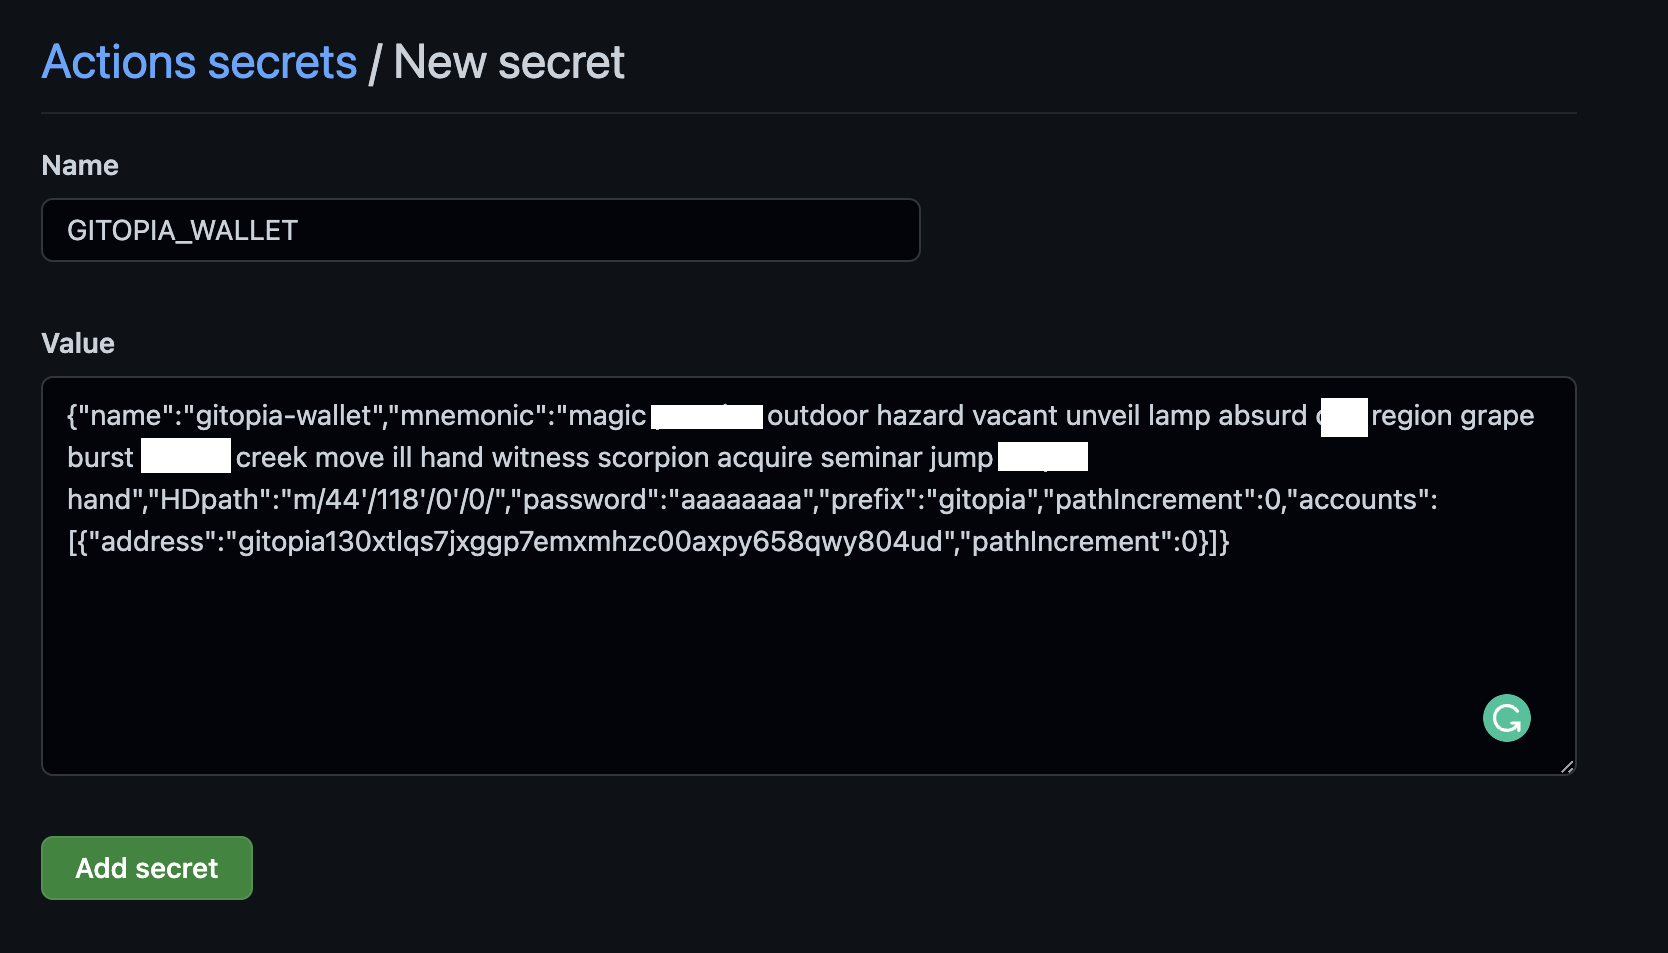
Your repository now has a Action Secret named GITOPIA_WALLET. This step is crucial for the Gitopia Mirror Action to function.
Step 7: Set up a GitHub Action
- Click on Actions to navigate to the GitHub Actions sections of your repository.

- Click on set up a workflow yourself.

This will help to create a main.yml file in the .github/workflows/ directory of your repository. The directory will be created automatically if it does not exist.
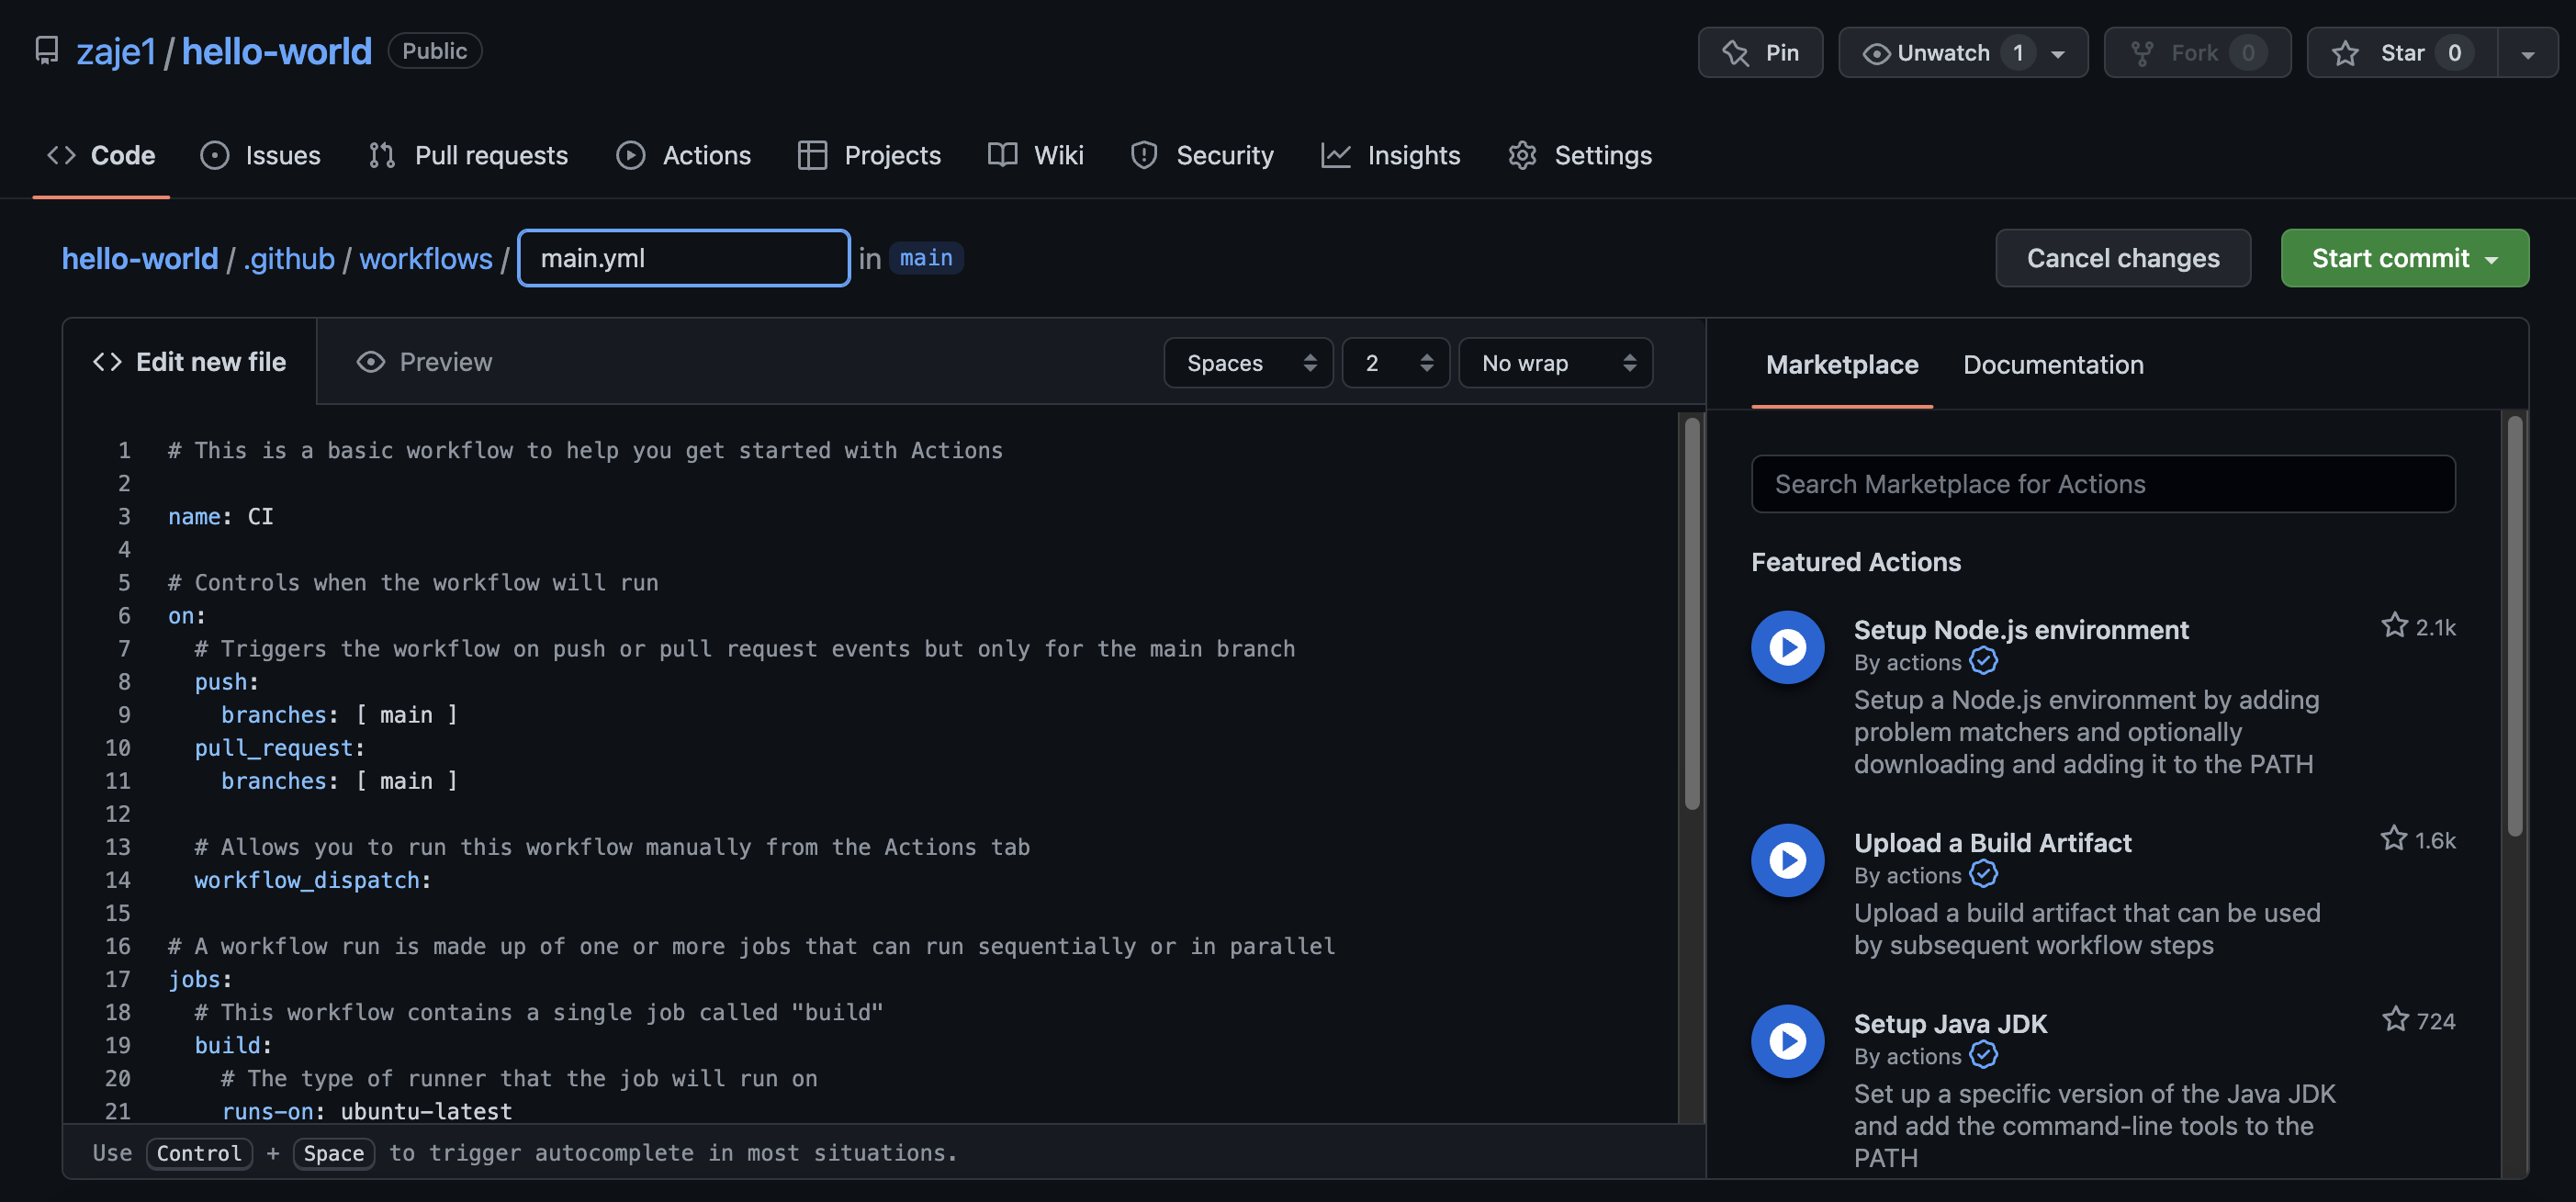
- Change the file name to
gitopia-mirror.ymland its contents to:
name: Mirror to Gitopia

on:
  push:
    branches:
      - '**'

jobs:
  build:
    runs-on: ubuntu-latest

    steps:
      - uses: actions/checkout@v2
        with:
          fetch-depth: 0
      - name: Push to Gitopia mirror
        uses: gitopia/gitopia-mirror-action@v0.5.0
        with:
          gitopiaWallet: "${{ secrets.GITOPIA_WALLET }}"
          remoteUrl: "gitopia://Gitopia-User/hello-world"
          force: false
Input details
gitopiaWallet: Your wallet file saved as a GitHub secret. Add Gitopia wallet contents to GitHub secrets called GITOPIA_WALLET as shown in the previous steps.
remoteUrl: Your Gitopia repository remote_url created from https://gitopia.com
force (optional): true/false, Force push to gitopia remote repository? Default is false, setting this to true will allow the mirror action to overwrite your gitopia remote repository. The changes done directly in your gitopia remote repository will be overwritten.
The checkout action that we use above, by default, checks out a shallow copy of your repo without history. fetch-depth: 0 configures it to checkout the branch with history.
on:
  push:
    branches:
      - '**'
In the above snippet, push to any branch will trigger the mirror action. You can change
**to a specific branch and only that branch will be used in the mirror action and get pushed to Gitopia. :::
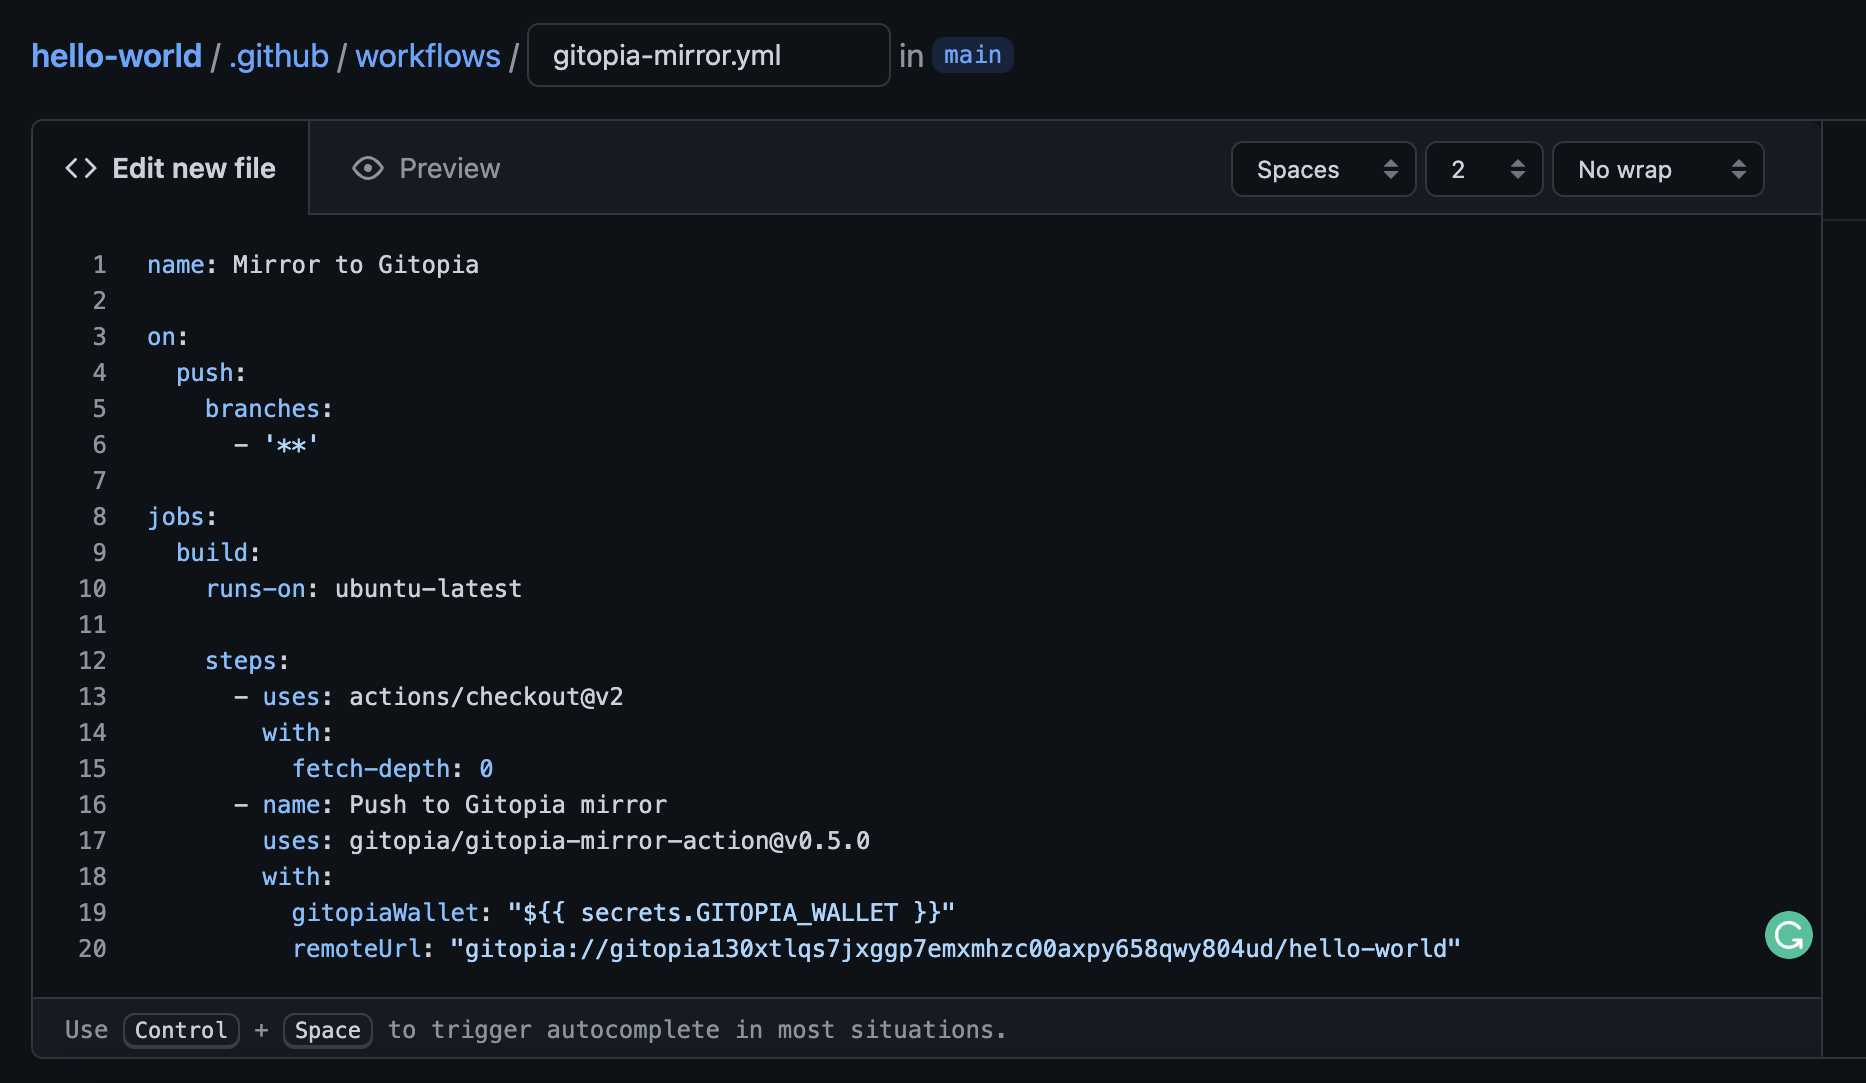
Your file, gitopia-mirror.yml, should now look like this:
Step 8: Commit the Changes
Commit the changes to your repository by clicking on Start commit and then Commit new file after filling in the required details.
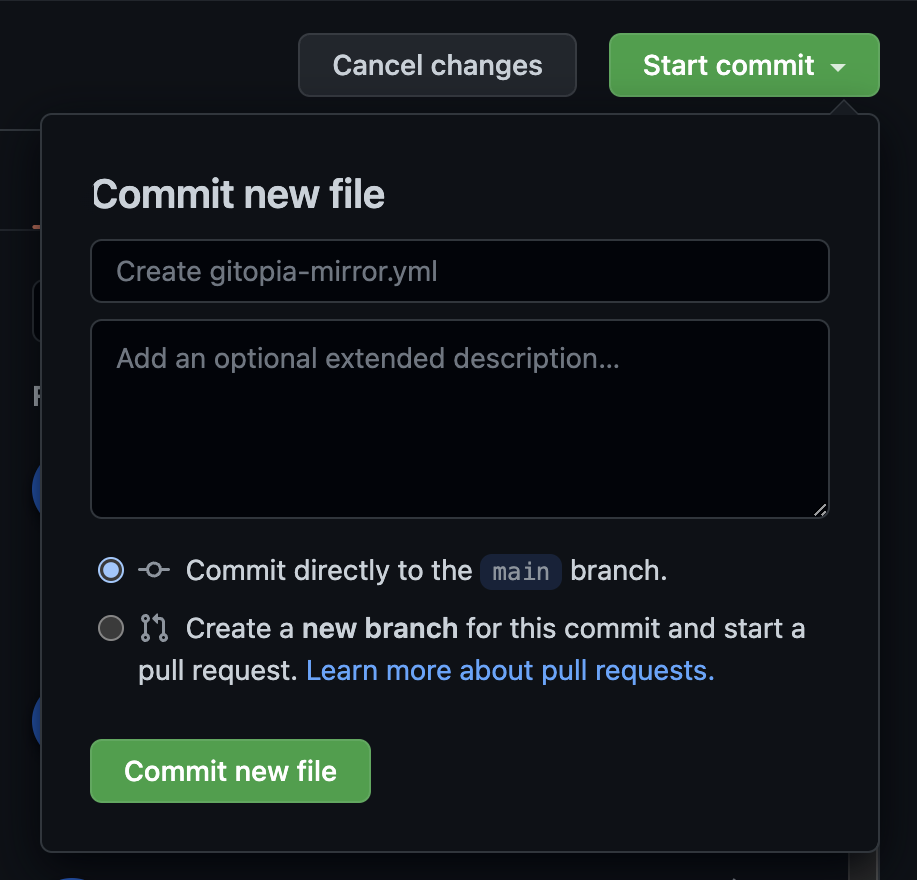
Your repository will now have a .github/workflows/ directory with a file gitopia-mirror.yml in it.

Step 9: GitHub Action is Triggered
Commiting the changes will triger a Github Action as described in the above .yml. In the future, pushing any branch to GitHub will trigger the Github Action.

Step 10: Verify Migration
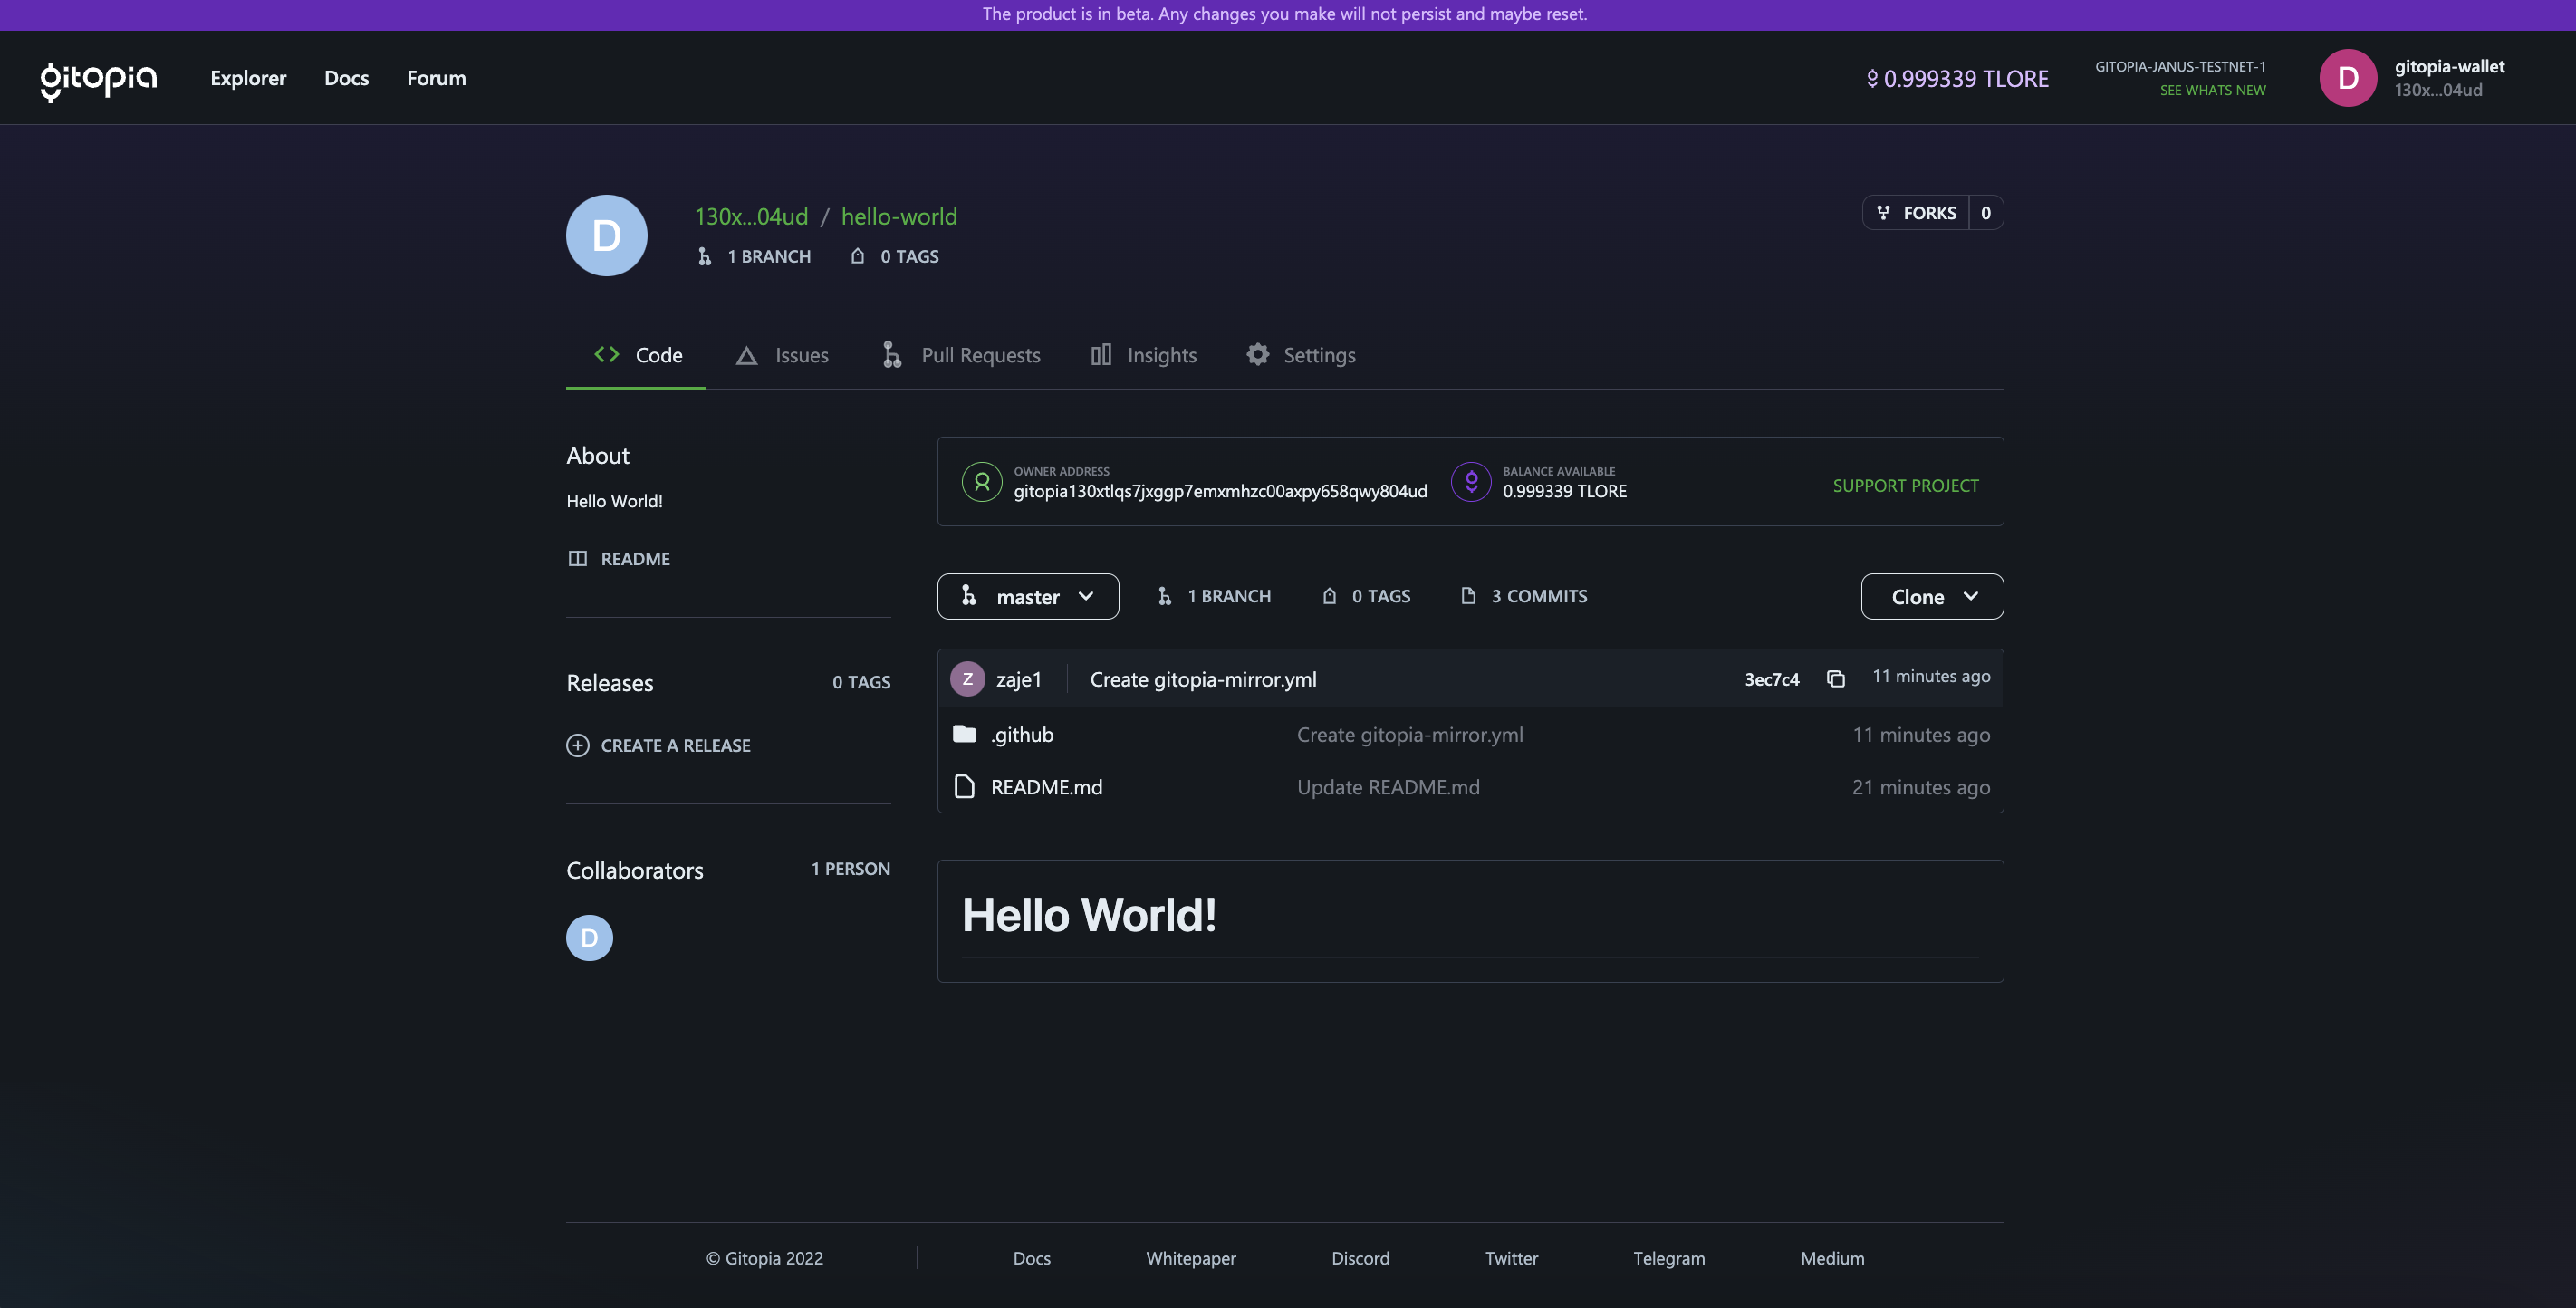
As you can see in the above image, the code has been pushed to Gitopia. Now, we wait for the Gitopia transaction to confirm, and voila - you can see your repository directory and files on Gitopia.
